Laravel 8 Send Mail using Queue
Websolutionstuff | Sep-24-2021 | Categories : Laravel PHP
In this tutorial I will show you laravel 8 send mail using queue, many time we can see some process to take more time to load like email send, cron job etc. Whenever you are sending email for verification then it load time to send mail because it is services. If you don't want to wait to user for send email or other process on loading server side process then you can use queue.
This tutorial will completely guide you on how to send mail using queue job in laravel 8. And you will learn step by step how to send email in laravel 8 using queue job with mailtrap.
So, let's start laravel 8 send mail using queue or how to send e-mail using queue in laravel 8.
Install Laravel application using comoposer command.
Create mail file SendEmailDemo using run below command in your terminal.
php artisan make:mail SendEmailDemo
Now you will find new Mail folder in app directory with SendEmailDemo.php file. So copy below code on this file.
app/Mail/SendEmailTest.php
<?php

namespace App\Mail;

use Illuminate\Bus\Queueable;
use Illuminate\Contracts\Queue\ShouldQueue;
use Illuminate\Mail\Mailable;
use Illuminate\Queue\SerializesModels;

class SendEmailDemo extends Mailable
{
    use Queueable, SerializesModels;

    /**
     * Create a new message instance.
     *
     * @return void
     */
    public function __construct()
    {
        //
    }

    /**
     * Build the message.
     *
     * @return $this
     */
    public function build()
    {
        return $this->subject('Test Mail using Queue in Larvel 8')
            ->view('email.demo');
    }
}
After that we need to create email view using blade file.So,we will create demo.blade.php following path.
resources/views/email/demo.blade.php
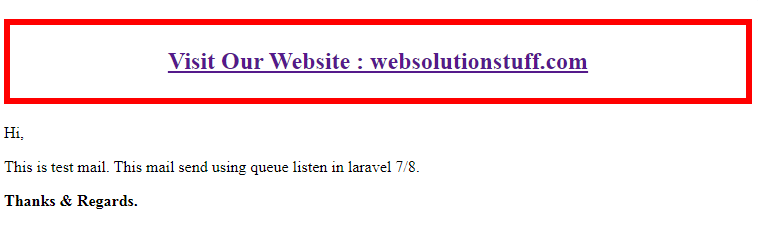
<!DOCTYPE html>
<html>
<head>
	<title>How to send mail using queue in Laravel 8 ?</title>
</head>
<body>

<center>
<h2 style="padding: 23px;border: 6px red solid;">
	<a href="https://websolutionstuff.com">Visit Our Website : websolutionstuff.com</a>
</h2>
</center>

<p>Hi,</p>
<p>This is test mail. This mail send using queue listen in laravel 8.</p>
<strong>Thanks & Regards.</strong>

</body>
</html>
Now, we will configuration of view file, we have to setup for email send, So let' set configuration in .env file.
MAIL_MAILER=smtp
MAIL_HOST=smtp.mailtrap.io
MAIL_PORT=2525
MAIL_USERNAME=xxxx
MAIL_PASSWORD=xxxx
MAIL_ENCRYPTION=tls
MAIL_FROM_ADDRESS=null
MAIL_FROM_NAME="${APP_NAME}"
Now, we are setup configuration on queue driver so first of all, we will set queue driver "database". You can set as you want also we will define driver as redis too. So here define database driver on .env file.
QUEUE_CONNECTION=database
After that we need to generate migration and create tables for queue. So let's run below command for queue database tables.
php artisan queue:table
Now, run migration in your terminal.
php artisan migrate
In this step we will create new queue job So, copy below command in your termianal.
php artisan make:job SendEmailJob
As of now you will find SendEmailJob.php file in this path app/Jobs/SendEmailJob.php. So, copy below code in that location.
<?php

namespace App\Jobs;

use Illuminate\Bus\Queueable;
use Illuminate\Contracts\Queue\ShouldQueue;
use Illuminate\Foundation\Bus\Dispatchable;
use Illuminate\Queue\InteractsWithQueue;
use Illuminate\Queue\SerializesModels;
use App\Mail\SendEmailDemo;
use Mail;

class SendEmailJob implements ShouldQueue
{
    use Dispatchable, InteractsWithQueue, Queueable, SerializesModels;
    protected $send_mail;
    /**
     * Create a new job instance.
     *
     * @return void
     */
    public function __construct($send_mail)
    {
        $this->send_mail = $send_mail;
    }

    /**
     * Execute the job.
     *
     * @return void
     */
    public function handle()
    {
        $email = new SendEmailDemo();
        Mail::to($this->send_mail)->send($email);
    }
}
Now , we will test our queue job. add below code in your web.php file
Route::get('test/email', function(){

	$send_mail = '[email protected]';

    dispatch(new App\Jobs\SendEmailJob($send_mail));

    dd('send mail successfully !!');
});
Now, clear config cache using below command for send mail with queue laravel 7/8.
php artisan config:clear
Now, run this laravel 7/8 queue example with artisan command.
php artisan serve
Finally, we are able to run this queue example.you will get result like below images.

You might also like :
- Read More : Node.js Express CRUD Example with MySQL
- Read More : Laravel Firebase Push Notification
- Read More : Laravel 8 Socialite Login with Facebook Account
- Read More : How To Create Dynamic Linechart In Laravel
- Read More : How To Send Email With Attachment Using Node.js
Recommended Post
Featured Post

How To Get Last 15 Days Record...
In this tutorial, we will see how to get the last 15 days records in MySQL PHP. In PHP, you can use INTERVAL...
Feb-09-2022

File Upload With Progress Bar...
In this article, we will see the file upload with a progress bar in angular 13. In this example, we will learn how to im...
Jun-11-2022

Laravel Signature Pad Example
In this article, we will learn about the laravel signature pad example. we will perform a digital signature pad in larav...
Feb-03-2021

How To Redirect Another Page U...
In this article, we will see how to redirect another page using javascript. we will redirect the page to another pa...
Nov-04-2022