How To Create Web Notifications In Laravel 9 Using Pusher
Websolutionstuff | Feb-03-2023 | Categories : Laravel PHP
In this article, we will see how to create web notifications in laravel 9 using pusher. Here, we will learn how to develop real-time web notifications in laravel 7, laravel 8, and laravel 9 using pusher. we would demonstrate when someone carries out an action related to you or your account.
So, let's see laravel 8/9 pusher notification, laravel 9 pusher web notifications, how to create real time web push notifications in laravel 7/8/9, how to create real time notifications in laravel, and send real time notifications with Pusher using Laravel 8/9.
In laravel, easy to build modern applications with real-time interaction with the help of an event broadcasting system. which allows developers to share the same event names between the server-side code and the client-side JavaScript application. Also, we will see how to create an event in laravel 8 and laravel 9. And learn more about Laravel Events.
Pusher is an easy and reliable platform for building real-time applications. Also, Laravel supports Pusher, which makes building realtime applications with laravel and pusher seamless.
How to build real-time web notifications in Laravel with Pusher
In this step, we will install the laravel 9 application using the following composer command.
composer create-project laravel/laravel laravel-9-web-notifications
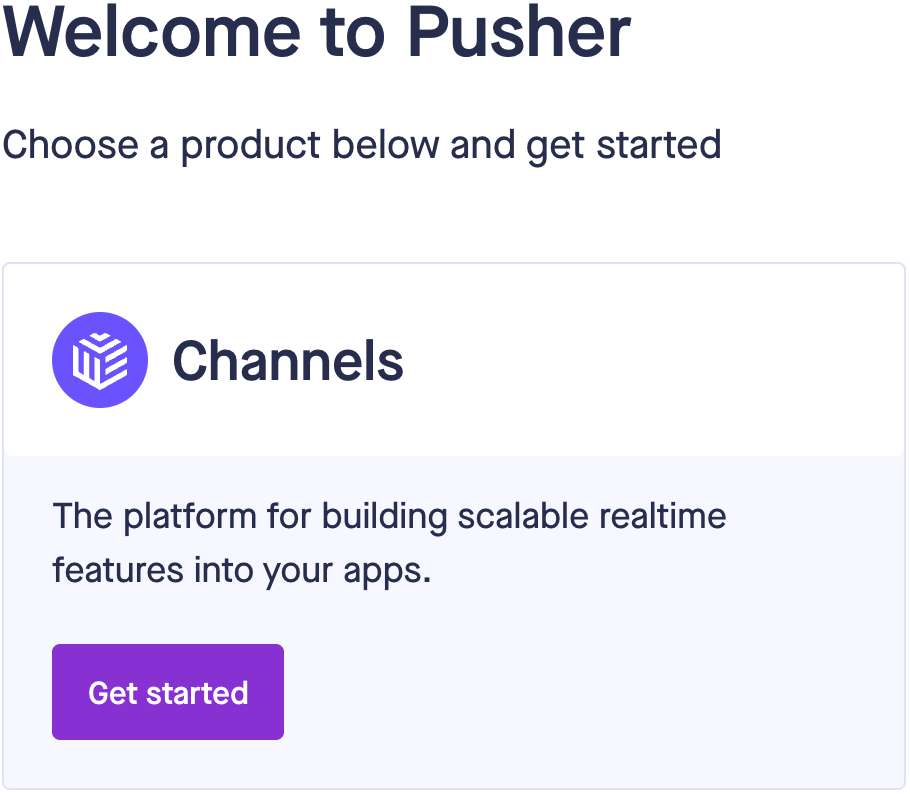
Now, we will create Pusher Account. The Channels sandbox plan is completely free. Create Pusher Account.
How to create a Channels app
Once you have signed up for a Pusher account you need to create a Channels.
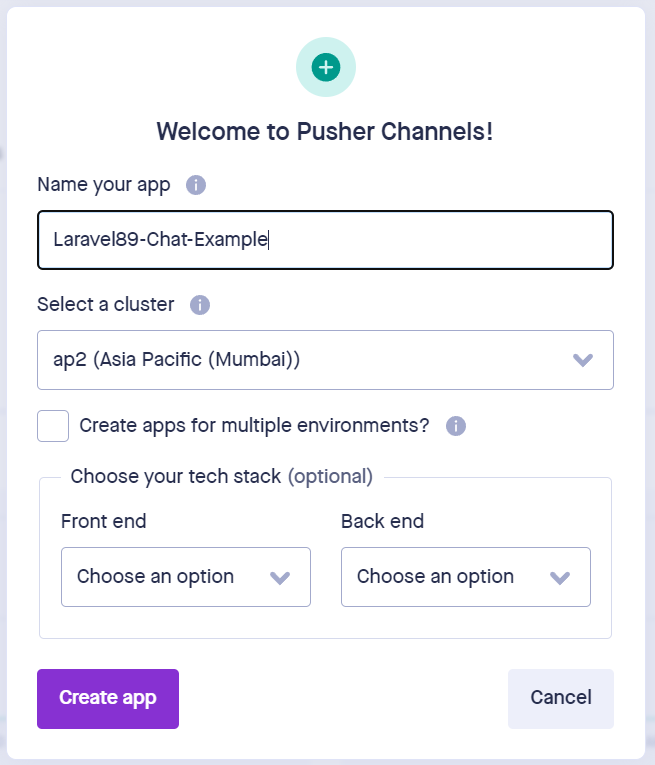
After that, create an application and add a pusher application name, cluster, and stack. The tech stack settings are optional.
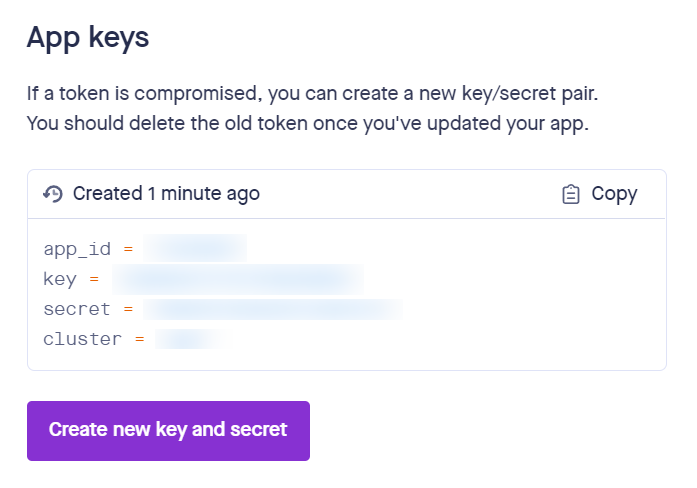
From the App Keys page note down the app_id, key, secret and cluster as you will need these to connect to your Channels app.
In this step, we will set up a pusher. So, Register for the Broadcast application service by opening config/app.php and uncommenting this line.
// App\Providers\BroadcastServiceProvider::class,
Note: If you’re using the EU or AP Cluster, make sure to update the options array in your config/broadcasting.php config since Laravel defaults to using the US Server.
After that, open the .env file and change the BROADCAST_DRIVER from its default “log” value to “pusher".
BROADCAST_DRIVER=pusher
Now, we will set up the Pusher ID and key in the .env file. Laravel already integrates some of the Pusher configurations, so you just need to fill in the keys you got when you created your Channels app.
PUSHER_APP_ID=xxxx
PUSHER_APP_KEY=xxxxxx
PUSHER_APP_SECRET=xxxxxx
PUSHER_APP_CLUSTER=xxx
In this step, we will install pusher/pusher-php-server using the composer command.
composer require pusher/pusher-php-server
Note: If you face the error Class 'Pusher\Pusher' not found add the below code into the config/app.php file.
'aliases' => [

        ...

        'Pusher' => Pusher\Pusher::class,

    ],
In this step, we will add routes in the web.php file.
routes/web.php
<?php
use Illuminate\Support\Facades\Route;
/*
|--------------------------------------------------------------------------
| Web Routes
|--------------------------------------------------------------------------
|
| Here is where you can register web routes for your application. These
| routes are loaded by the RouteServiceProvider within a group which
| contains the "web" middleware group. Now create something great!
|
*/
Route::get('/', function () {
return view('welcome');
});
Auth::routes();
Route::get('/home', [App\Http\Controllers\HomeController::class, 'index'])->name('home');
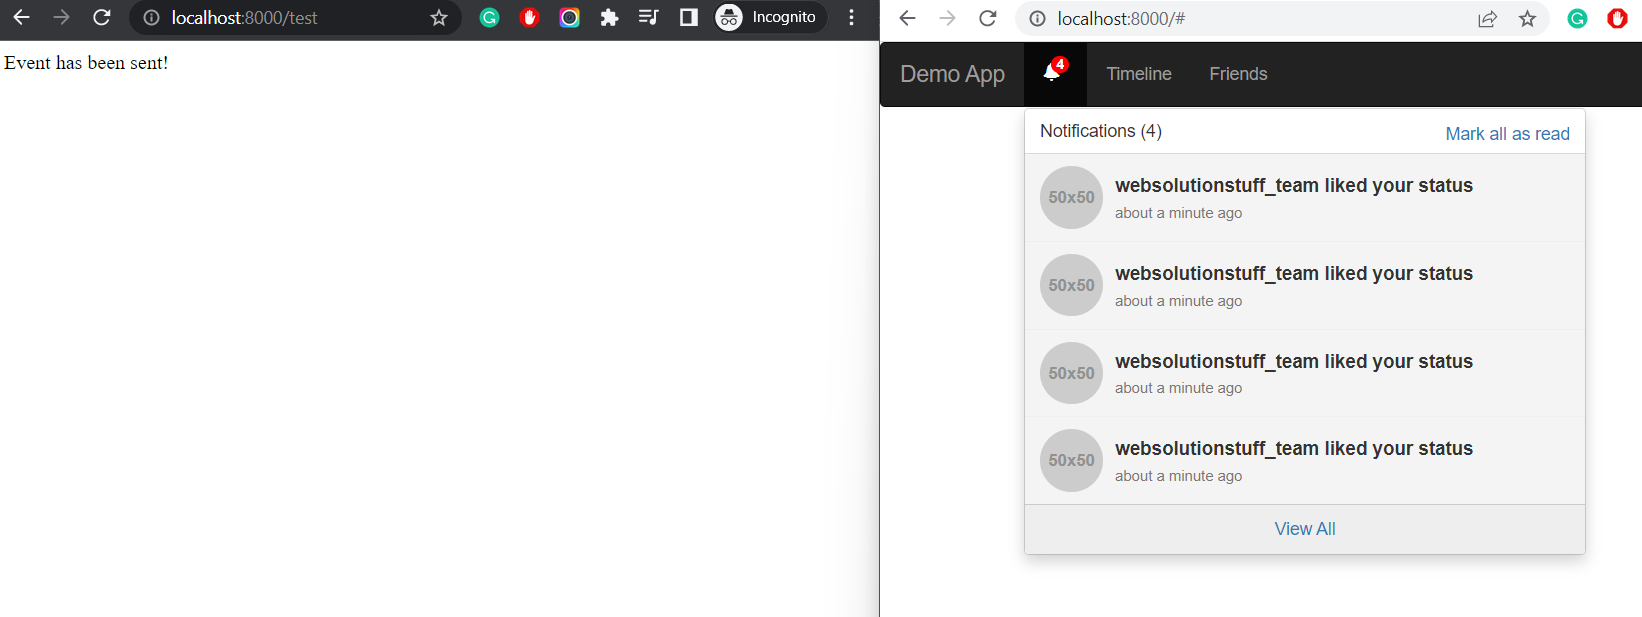
Route::get('test', function () {
event(new App\Events\MessageSent('websolutionstuff_team'));
return "Event has been sent!";
});
Now, open the welcome.blade.php file and replace it with the below code.
resources/views/welcome.blade.php
<!DOCTYPE html>
<html lang="en">
  <head>
    <meta charset="utf-8">
    <meta http-equiv="X-UA-Compatible" content="IE=edge">
    <meta name="viewport" content="width=device-width, initial-scale=1">
    <title>How To Create Web Notifications In Laravel 9 Using Pusher - Websolutionstuff</title>
    <link rel="stylesheet" href="//maxcdn.bootstrapcdn.com/bootstrap/3.3.7/css/bootstrap.min.css" integrity="sha384-BVYiiSIFeK1dGmJRAkycuHAHRg32OmUcww7on3RYdg4Va+PmSTsz/K68vbdEjh4u" crossorigin="anonymous">
    <style>
 */.dropdown-container{position:absolute;top:100%;left:0;z-index:1000;display:none;float:left;min-width:200px;max-width:330px;margin:2px 0 0;list-style:none;font-size:14px;background-color:#fff;border:1px solid #ccc;border:1px solid rgba(0,0,0,0.15);border-radius:4px;-webkit-box-shadow:0 6px 12px rgba(0,0,0,0.175);box-shadow:0 6px 12px rgba(0,0,0,0.175);background-clip:padding-box}.dropdown-container>.dropdown-menu{position:static;z-index:1000;float:none !important;padding:10px 0;margin:0;border:0;background:transparent;border-radius:0;-webkit-box-shadow:none;box-shadow:none;max-height:330px;overflow-y:auto}.dropdown-container>.dropdown-menu+.dropdown-menu{padding-top:0}.dropdown-menu>li>a{overflow:hidden;white-space:nowrap;word-wrap:normal;text-decoration:none;text-overflow:ellipsis;-o-text-overflow:ellipsis;-webkit-transition:none;-o-transition:none;transition:none}.dropdown-toggle{cursor:pointer}.dropdown-header{white-space:nowrap}.open>.dropdown-container>.dropdown-menu,.open>.dropdown-container{display:block}.dropdown-toolbar{padding-top:6px;padding-left:20px;padding-right:20px;padding-bottom:5px;background-color:#fff;border-bottom:1px solid rgba(0,0,0,0.15);border-radius:4px 4px 0 0}.dropdown-toolbar>.form-group{margin:5px -10px}.dropdown-toolbar .dropdown-toolbar-actions{float:right}.dropdown-toolbar .dropdown-toolbar-title{margin:0;font-size:14px}.dropdown-footer{padding:5px 20px;border-top:1px solid #ccc;border-top:1px solid rgba(0,0,0,0.15);border-radius:0 0 4px 4px}.anchor-block small{display:none}@media (min-width:992px){.anchor-block small{display:block;font-weight:normal;color:#777777}.dropdown-menu>li>a.anchor-block{padding-top:6px;padding-bottom:6px}}@media (min-width:992px){.dropdown.hoverable:hover>ul{display:block}}.dropdown-position-topright{top:auto;right:0;bottom:100%;left:auto;margin-bottom:2px}.dropdown-position-topleft{top:auto;right:auto;bottom:100%;left:0;margin-bottom:2px}.dropdown-position-bottomright{right:0;left:auto}.dropmenu-item-label{white-space:nowrap}.dropmenu-item-content{position:absolute;text-align:right;max-width:60px;right:20px;color:#777777;overflow:hidden;white-space:nowrap;word-wrap:normal;-o-text-overflow:ellipsis;text-overflow:ellipsis}small.dropmenu-item-content{line-height:20px}.dropdown-menu>li>a.dropmenu-item{position:relative;padding-right:66px}.dropdown-submenu .dropmenu-item-content{right:40px}.dropdown-menu>li.dropdown-submenu>a.dropmenu-item{padding-right:86px}.dropdown-inverse .dropdown-menu{background-color:rgba(0,0,0,0.8);border:1px solid rgba(0,0,0,0.9)}.dropdown-inverse .dropdown-menu .divider{height:1px;margin:9px 0;overflow:hidden;background-color:#2b2b2b}.dropdown-inverse .dropdown-menu>li>a{color:#cccccc}.dropdown-inverse .dropdown-menu>li>a:hover,.dropdown-inverse .dropdown-menu>li>a:focus{color:#fff;background-color:#262626}.dropdown-inverse .dropdown-menu>.active>a,.dropdown-inverse .dropdown-menu>.active>a:hover,.dropdown-inverse .dropdown-menu>.active>a:focus{color:#fff;background-color:#337ab7}.dropdown-inverse .dropdown-menu>.disabled>a,.dropdown-inverse .dropdown-menu>.disabled>a:hover,.dropdown-inverse .dropdown-menu>.disabled>a:focus{color:#777777}.dropdown-inverse .dropdown-header{color:#777777}.table>thead>tr>th.col-actions{padding-top:0;padding-bottom:0}.table>thead>tr>th.col-actions .dropdown-toggle{color:#777777}.notifications{list-style:none;padding:0}.notification{display:block;padding:9.6px 12px;border-bottom:1px solid #eeeeee;color:#333333;text-decoration:none}.notification:last-child{border-bottom:0}.notification:hover,.notification.active:hover{background-color:#f9f9f9}.notification.active{background-color:#f4f4f4}.notification-title{font-size:15px;margin-bottom:0}.notification-desc{margin-bottom:0}.notification-meta{color:#777777}a.notification:hover{text-decoration:none}.dropdown-notifications>.dropdown-container,.dropdown-notifications>.dropdown-menu{width:450px;max-width:450px}.dropdown-notifications .dropdown-menu{padding:0}.dropdown-notifications .dropdown-toolbar,.dropdown-notifications .dropdown-footer{padding:9.6px 12px}.dropdown-notifications .dropdown-toolbar{background:#fff}.dropdown-notifications .dropdown-footer{background:#eeeeee}.notification-icon{margin-right:6.8775px}.notification-icon:after{position:absolute;content:attr(data-count);margin-left:-6.8775px;margin-top:-6.8775px;padding:0 4px;min-width:13.755px;height:13.755px;line-height:13.755px;background:red;border-radius:10px;color:#fff;text-align:center;vertical-align:middle;font-size:11.004px;font-weight:600;font-family:"Helvetica Neue",Helvetica,Arial,sans-serif}.notification .media-body{padding-top:5.6px}.btn-lg .notification-icon:after{margin-left:-8.253px;margin-top:-8.253px;min-width:16.506px;height:16.506px;line-height:16.506px;font-size:13.755px}.btn-xs .notification-icon:after{content:'';margin-left:-4.1265px;margin-top:-2.06325px;min-width:6.25227273px;height:6.25227273px;line-height:6.25227273px;padding:0}.btn-xs .notification-icon{margin-right:3.43875px}
    </style>
  </head>
  <body>
    <nav class="navbar navbar-inverse">
      <div class="container-fluid">
        <div class="navbar-header">
          <button type="button" class="navbar-toggle collapsed" data-toggle="collapse" data-target="#bs-example-navbar-collapse-9" aria-expanded="false">
            <span class="sr-only">Toggle navigation</span>
            <span class="icon-bar"></span>
            <span class="icon-bar"></span>
            <span class="icon-bar"></span>
          </button>
          <a class="navbar-brand" href="#">Websolutionstuff</a>
        </div>

        <div class="collapse navbar-collapse">
          <ul class="nav navbar-nav">
            <li class="dropdown dropdown-notifications">
              <a href="#notifications-panel" class="dropdown-toggle" data-toggle="dropdown">
                <i data-count="0" class="glyphicon glyphicon-bell notification-icon"></i>
              </a>

              <div class="dropdown-container">
                <div class="dropdown-toolbar">
                  <div class="dropdown-toolbar-actions">
                    <a href="#">Mark all as read</a>
                  </div>
                  <h3 class="dropdown-toolbar-title">Notifications (<span class="notif-count">0</span>)</h3>
                </div>
                <ul class="dropdown-menu">
                </ul>
                <div class="dropdown-footer text-center">
                  <a href="#">View All</a>
                </div>
              </div>
            </li>
            <li><a href="#">Timeline</a></li>
            <li><a href="#">Friends</a></li>
          </ul>
        </div>
      </div>
    </nav>

    <script src="//cdnjs.cloudflare.com/ajax/libs/jquery/2.1.4/jquery.min.js"></script>
    <script src="//js.pusher.com/3.1/pusher.min.js"></script>
    <script src="//maxcdn.bootstrapcdn.com/bootstrap/3.3.7/js/bootstrap.min.js" integrity="sha384-Tc5IQib027qvyjSMfHjOMaLkfuWVxZxUPnCJA7l2mCWNIpG9mGCD8wGNIcPD7Txa" crossorigin="anonymous"></script>

    <script type="text/javascript">
      var notificationsWrapper   = $('.dropdown-notifications');
      var notificationsToggle    = notificationsWrapper.find('a[data-toggle]');
      var notificationsCountElem = notificationsToggle.find('i[data-count]');
      var notificationsCount     = parseInt(notificationsCountElem.data('count'));
      var notifications          = notificationsWrapper.find('ul.dropdown-menu');

      if (notificationsCount <= 0) {
        notificationsWrapper.hide();
      }

      var pusher = new Pusher('API_KEY_HERE', {
        encrypted: true,
        cluster: 'ap2'
      });

      // Subscribe to the channel we specified in our Laravel Event
      var channel = pusher.subscribe('status-liked');

      // Bind a function to a Event (the full Laravel class)
      channel.bind('App\\Events\\MessageSent', function(data) {
        var existingNotifications = notifications.html();

        var newNotificationHtml = `
          <li class="notification active">
              <div class="media">
                <div class="media-left">
                  <div class="media-object">
                    <img src="data:image/svg+xml;charset=UTF-8,%3Csvg%20width%3D%2250%22%20height%3D%2250%22%20xmlns%3D%22http%3A%2F%2Fwww.w3.org%2F2000%2Fsvg%22%20viewBox%3D%220%200%2050%2050%22%20preserveAspectRatio%3D%22none%22%3E%3Cdefs%3E%3Cstyle%20type%3D%22text%2Fcss%22%3E%23holder_1854e547215%20text%20%7B%20fill%3A%23919191%3Bfont-weight%3Abold%3Bfont-family%3AArial%2C%20Helvetica%2C%20Open%20Sans%2C%20sans-serif%2C%20monospace%3Bfont-size%3A10pt%20%7D%20%3C%2Fstyle%3E%3C%2Fdefs%3E%3Cg%20id%3D%22holder_1854e547215%22%3E%3Crect%20width%3D%2250%22%20height%3D%2250%22%20fill%3D%22%23cccccc%22%3E%3C%2Frect%3E%3Cg%3E%3Ctext%20x%3D%226.46875%22%20y%3D%2229.55999994277954%22%3E50x50%3C%2Ftext%3E%3C%2Fg%3E%3C%2Fg%3E%3C%2Fsvg%3E" class="img-circle" alt="50x50" style="width: 50px; height: 50px;">
                  </div>
                </div>
                <div class="media-body">
                  <strong class="notification-title">`+data.message+`</strong>
                  <!--p class="notification-desc">Extra description can go here</p-->
                  <div class="notification-meta">
                    <small class="timestamp">about a minute ago</small>
                  </div>
                </div>
              </div>
          </li>
        `;
        notifications.html(newNotificationHtml + existingNotifications);

        notificationsCount += 1;
        notificationsCountElem.attr('data-count', notificationsCount);
        notificationsWrapper.find('.notif-count').text(notificationsCount);
        notificationsWrapper.show();
      });
    </script>
  </body>
</html>
In this step, we will create a Message event using the below command. So, add the below code to that file. Also, Add the implements ShouldBroadcast interface to the MessageSent class
php artisan make:event MessageSent
app/Events/MessageSent.php
<?php

namespace App\Events;

use Illuminate\Broadcasting\Channel;
use Illuminate\Broadcasting\InteractsWithSockets;
use Illuminate\Broadcasting\PresenceChannel;
use Illuminate\Broadcasting\PrivateChannel;
use Illuminate\Contracts\Broadcasting\ShouldBroadcast;
use Illuminate\Foundation\Events\Dispatchable;
use Illuminate\Queue\SerializesModels;

class MessageSent implements ShouldBroadcast
{
    use Dispatchable, InteractsWithSockets, SerializesModels;

    public $username;

    public $message;

    /**
     * Create a new event instance.
     *
     * @return void
     */
    public function __construct($username)
    {
        $this->username = $username;
        $this->message  = "{$username} liked your status";
    }

    /**
     * Get the channels the event should broadcast on.
     *
     * @return Channel|array
     */
    public function broadcastOn()
    {
        return ['status-liked'];
    }
}
Now, we will run the laravel 9 real time web notification using pusher application using the following command.
php artisan serve
we will get a new notification anytime we hit the route.
Output:
You might also like:
- Read Also: How to Integrate Razorpay Payment Gateway in Laravel
- Read Also: Laravel 9 User Roles and Permissions Without Package
- Read Also: How to Deploy Laravel on Heroku with Database
- Read Also: Laravel 9 CRUD Operation Example
Recommended Post
Featured Post

Custom Toastr Notification In...
In this article, we will see a custom toastr notification in laravel 9. we will create a custom notification using HTML,...
Sep-23-2022

How To Backup Database In Lara...
In this article, we will see how to back up the database in laravel 9 using spatie. Here, we will learn automatic&n...
Feb-08-2023

Laravel 9 Livewire File Upload...
In this article, we will see the laravel 9 livewire file upload example. Here, we will learn how to upload files us...
Dec-02-2022

Laravel 8 Remove/Hide Columns...
In this article, we will see how to remove/hide columns while export data in datatables in laravel 8. When we are u...
Oct-13-2020