How To Image Optimization In Laravel 9 Using Spatie
Websolutionstuff | Feb-10-2023 | Categories : Laravel
In this article, we will see how to image optimization in laravel 9 using spatie. Here, we will learn about image optimization in laravel 8 and laravel 9. Here will use spatie/image-optimizer package to optimize the image. It can easily optimize the image.
This package can optimize PNGs, JPGs, SVGs and GIFs by running them through a chain of various image optimization tools.
So, let's see laravel 9 image compression, how to optimize images in laravel 9, laravel 9 image resize, laravel 9 image optimizer, and image optimizer laravel 8.
In this step, we will install laravel 9 using the following command.
composer create-project laravel/laravel laravel-9-image-optimization
Now, we will install the image optimizer package using the composer command.
composer require spatie/image-optimizer
The package will use these optimizers if they are present on your system:
In this step, we will publish the package using the following command.
php artisan vendor:publish --provider="Spatie\LaravelImageOptimizer\ImageOptimizerServiceProvider"
After running the above command, it can generate an image-optimizer.php file.
config/image-optimzer.php
<?php

use Spatie\ImageOptimizer\Optimizers\Cwebp;
use Spatie\ImageOptimizer\Optimizers\Gifsicle;
use Spatie\ImageOptimizer\Optimizers\Jpegoptim;
use Spatie\ImageOptimizer\Optimizers\Optipng;
use Spatie\ImageOptimizer\Optimizers\Pngquant;
use Spatie\ImageOptimizer\Optimizers\Svgo;

return [
    /*
     * When calling `optimize` the package will automatically determine which optimizers
     * should run for the given image.
     */
    'optimizers' => [

        Jpegoptim::class => [
            '-m85', // set maximum quality to 85%
            '--strip-all',  // this strips out all text information such as comments and EXIF data
            '--all-progressive',  // this will make sure the resulting image is a progressive one
        ],

        Pngquant::class => [
            '--force', // required parameter for this package
        ],

        Optipng::class => [
            '-i0', // this will result in a non-interlaced, progressive scanned image
            '-o2',  // this set the optimization level to two (multiple IDAT compression trials)
            '-quiet', // required parameter for this package
        ],

        Svgo::class => [
            '--disable=cleanupIDs', // disabling because it is know to cause troubles
        ],

        Gifsicle::class => [
            '-b', // required parameter for this package
            '-O3', // this produces the slowest but best results
        ],

        Cwebp::class => [
            '-m 6', // for the slowest compression method in order to get the best compression.
            '-pass 10', // for maximizing the amount of analysis pass.
            '-mt', // multithreading for some speed improvements.
            '-q 90', // quality factor that brings the least noticeable changes.
        ],
    ],

    /*
    * The directory where your binaries are stored.
    * Only use this when you binaries are not accessible in the global environment.
    */
    'binary_path' => '',

    /*
     * The maximum time in seconds each optimizer is allowed to run separately.
     */
    'timeout' => 60,

    /*
     * If set to `true` all output of the optimizer binaries will be appended to the default log.
     * You can also set this to a class that implements `Psr\Log\LoggerInterface`.
     */
    'log_optimizer_activity' => false,
];
In this step, we will create routes in the web.php file.
routes/web.php
<?php

use Illuminate\Support\Facades\Route;
use App\Http\Controllers\ImageOptimizationController;


/*
|--------------------------------------------------------------------------
| Web Routes
|--------------------------------------------------------------------------
|
| Here is where you can register web routes for your application. These
| routes are loaded by the RouteServiceProvider within a group which
| contains the "web" middleware group. Now create something great!
|
*/

Route::get('/optimize', [ImageOptimizationController::class, 'index']);
Route::get('/optimize/images', [ImageOptimizationController::class, 'store'])->middleware('optimizeImages');
Now, we will create ImageOptimizatioController using the following command.
php artisan make:controller ImageOptimizationController
app/Http/Controllers/ImageOptimizationController.php
<?php

namespace App\Http\Controllers;

use Illuminate\Http\Request;
use Session;

class ImageOptimizationController extends Controller
{
    public function index(){
        return view('image-optimize');
    }

    public function store() {
        $this->validate(request(), [
            'image' => 'required|image:jpeg '
        ]);

        request()->image->storeAs('images', 'optimized-img.jpg');

        Session::put('success', 'Image has been successfully optimize');

        return redirect()->back();
    }
}
Spatie package provides its own middleware for image optimization. add middleware in the kernel.php.
app/Http/Kernel.php
protected $routeMiddleware = [
        ..
        ..
        'optimizeImages' => \Spatie\LaravelImageOptimizer\Middlewares\OptimizeImages::class,
    ];
Now, we will create an image-optimizer.blade.php file. So, add the following HTML code to that file.
resources/views/image-optimize.blade.php
<!DOCTYPE html>
<html lang="{{ str_replace('_', '-', app()->getLocale()) }}">
    <head>
        <meta charset="utf-8">
        <meta name="viewport" content="width=device-width, initial-scale=1">

        <title>Laravel</title>
        <link href="https://cdnjs.cloudflare.com/ajax/libs/twitter-bootstrap/4.0.0-alpha/css/bootstrap.css" rel="stylesheet">
    </head>
    <body class="antialiased">
        <div class="container">
            <div class="panel-body">
                <div class="col-md-8">
                    <h5 style="margin-top: 50px;margin-bottom:30px;">How To Image Optimization In Laravel 9 Using Spatie - Websolutionstuff</h5>
                @if ($message = Session::get('success'))
                <div class="alert alert-success alert-block">
                    <button type="button" class="close" data-dismiss="alert">×</button>
                    <strong>{{ $message }}</strong>
                    {{ Session::flush(); }}
                </div>
                @endif

                @if (count($errors) > 0)
                    <div class="alert alert-danger">
                        <strong>Whoops!</strong> There were some problems with your input.
                        <ul>
                            @foreach ($errors->all() as $error)
                                <li>{{ $error }}</li>
                            @endforeach
                        </ul>
                    </div>
                @endif

                <form action="/optimize/images" method="POST" enctype="multipart/form-data">
                @csrf
                    <div class="row"> <br>
                        <div class="col-md-6">
                            <input type="file" name="image" class="form-control">
                        </div>
                        <div class="col-md-6">
                            <button type="submit" class="btn btn-success">Upload</button>
                        </div>
                    </div>
                </form>
                </div>
            </div>
        </div>
    </body>
</html>
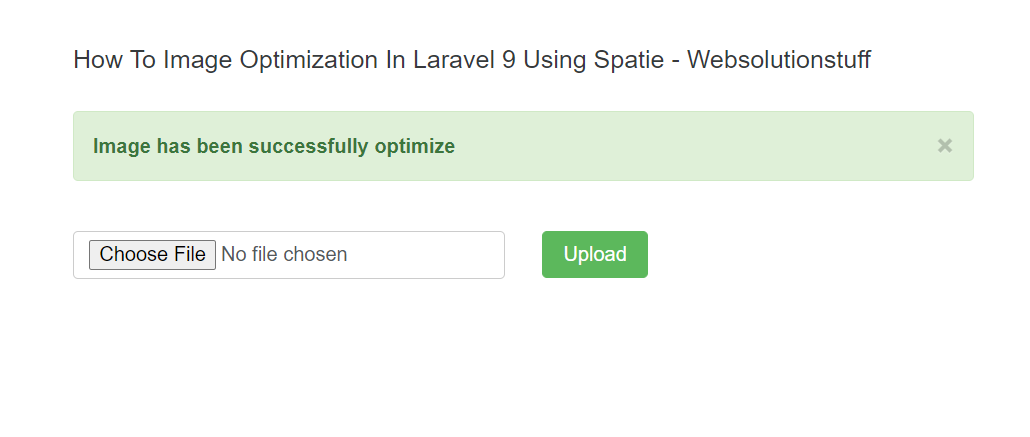
Now, we will run the laravel 9 image optimizer application using the following command.
php artisan serve
Output:

You might also like:
- Read Also: Laravel 9 Resize Image Before Upload
- Read Also: How To Convert Image To Base64 In Laravel 9
- Read Also: Laravel 9 CRUD With Image Upload Example
- Read Also: Laravel 9 Image Upload In Summernote Editor
Recommended Post
Featured Post

Image Upload in Summernote Edi...
In this post we will see how to upload image in summernote editor. there are many editor available in laravel...
Jul-09-2021

Require ext-curl is missing fr...
In this article, we will see require ext-curl * is missing from your system in ubuntu. When we set up the laravel 9...
Feb-16-2023

Laravel 8 Custom Email Verific...
In this article, we will see an example of laravel 8 custom email verification. Many web applications require users...
Dec-29-2021

Laravel 9 Firebase Push Notifi...
In this article, we will see a laravel 9 firebase push notification, a firebase notification through you can notify...
Sep-20-2022