Laravel Signature Pad Example
Websolutionstuff | Feb-03-2021 | Categories : Laravel PHP jQuery
In this article, we will learn about the laravel signature pad example. we will perform a digital signature pad in laravel 7/8 and also we will use the jquery signature pad plugin. Signature pad is a javascript library that takes advantage of HTML5 canvas elements and javascript to create a flexible and drawing smooth signature pad on your web page and app.
So, let's see how to create a digital signature in laravel 7/8 and jquery signature pad example.
So, if you want to implement a laravel e-signature or signature pad then follow the below steps and get the output of the laravel digital signature example.
Step 1: Install Laravel Application
Step 2: Create Route
Step 3: Create Controller
Step 4: Create View File
Step 5: Run Project
Create or install a new laravel project for the laravel signature pad example
composer create-project --prefer-dist laravel/laravel signature_pad
Create a route file for submitting the post method and view the file below.
<?php

use Illuminate\Support\Facades\Route;
use App\Http\Controllers\SignatureController;

Route::get('signature_pad', [SignatureController::class, 'index']);
Route::post('signature_pad', [SignatureController::class, 'store'])->name('signature_pad.store');
Now, we need to create SignatureController for the laravel signature pad example.
<?php

namespace App\Http\Controllers;

use Illuminate\Http\Request;

class SignatureController extends Controller
{
    public function index()
    {
        return view('signature_pad');
    }

    public function store(Request $request)
    {

        $folderPath = public_path('images/');

        $image = explode(";base64,", $request->signed);

        $image_type = explode("image/", $image[0]);

        $image_type_png = $image_type[1];

        $image_base64 = base64_decode($image[1]);

        $file = $folderPath . uniqid() . '.'.$image_type_png;
        file_put_contents($file, $image_base64);
        return back()->with('success', 'Signature store successfully !!');
    }
}
Now, create a view file and save it as signature_pad.blade.php
<html>
<head>
    <title>Laravel Signature Pad Example - websolutionstuff.com</title>
    <link rel="stylesheet" type="text/css" href="https://cdnjs.cloudflare.com/ajax/libs/twitter-bootstrap/4.3.1/css/bootstrap.css">
    <link rel="stylesheet" href="https://cdnjs.cloudflare.com/ajax/libs/jqueryui/1.12.1/jquery-ui.min.css" integrity="sha512-aOG0c6nPNzGk+5zjwyJaoRUgCdOrfSDhmMID2u4+OIslr0GjpLKo7Xm0Ao3xmpM4T8AmIouRkqwj1nrdVsLKEQ==" crossorigin="anonymous" />
    <link rel="stylesheet" type="text/css" href="http://keith-wood.name/css/jquery.signature.css">
    <style>
        .kbw-signature { width: 100%; height: 200px;}
        #sig canvas{ width: 100% !important; height: auto;}
    </style>
</head>
<body class="bg-dark">
<div class="container">
   <div class="row">
       <div class="col-md-6 offset-md-3 mt-5">
           <div class="card">
               <div class="card-header">
                   <h5>Laravel Signature Pad Example - websolutionstuff.com</h5>
               </div>
               <div class="card-body">
                    @if ($message = Session::get('success'))
                        <div class="alert alert-success  alert-dismissible">
                            <button type="button" class="close" data-dismiss="alert">×</button>
                            <strong>{{ $message }}</strong>
                        </div>
                    @endif
                    <form method="POST" action="{{ route('signature_pad.store') }}">
                        @csrf
                        <div class="col-md-12">
                            <label class="" for="">Draw Signature:</label>
                            <br/>
                            <div id="sig"></div>
                            <br><br>
                            <button id="clear" class="btn btn-danger">Clear Signature</button>
                            <button class="btn btn-success">Save</button>
                            <textarea id="signature" name="signed" style="display: none"></textarea>
                        </div>
                    </form>
               </div>
           </div>
       </div>
   </div>
</div>
<script src="https://code.jquery.com/jquery-3.5.1.min.js" integrity="sha256-9/aliU8dGd2tb6OSsuzixeV4y/faTqgFtohetphbbj0=" crossorigin="anonymous"></script>
<script src="https://code.jquery.com/ui/1.12.1/jquery-ui.min.js" integrity="sha256-VazP97ZCwtekAsvgPBSUwPFKdrwD3unUfSGVYrahUqU=" crossorigin="anonymous"></script>
<script type="text/javascript" src="http://keith-wood.name/js/jquery.signature.js"></script>
<script type="text/javascript">
    var sig = $('#sig').signature({syncField: '#signature', syncFormat: 'PNG'});
    $('#clear').click(function(e) {
        e.preventDefault();
        sig.signature('clear');
        $("#signature").val('');
    });
</script>
</body>
</html>
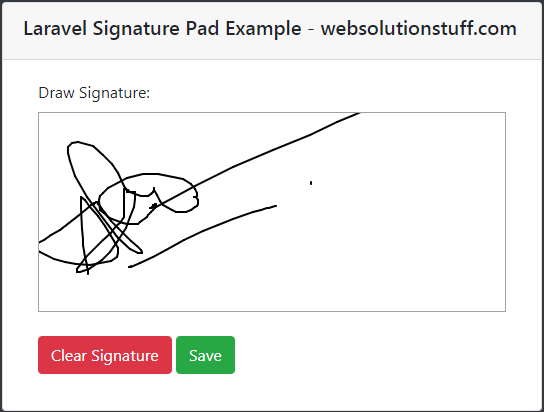
Output:
You might also like:
- Read Also: How To Preview Image Before Upload In jQuery
- Read Also: How To Show Loading Spinner In Ajax jQuery
- Read Also: Scrolla - jQuery Plugin for Reveal Animations
- Read Also: Date Range Filter In Datatable jQuery Example
Recommended Post
Featured Post

Laravel 9 Generate PDF From HT...
In this article, we will see laravel 9 generate PDF from HTML using TCPDF. Here, we will learn how to integrate tcpdf in...
Jan-31-2023

How To Upload Large CSV File U...
In this article, we will see how to upload a large CSV file using queue in laravel 9. Here we will learn large numb...
Sep-16-2022

How To Install Bootstrap In Re...
In this article, we will see how to install bootstrap in react js. Also, we will see how to use bootstrap in react...
Sep-08-2022

How To Create Custom Error Pag...
In this article, we will see how to create a custom error page in laravel 9. Here we will create a custom 404 error...
Feb-09-2023