CRUD With Image Upload In Laravel 10 Example
Websolutionstuff | Mar-27-2023 | Categories : Laravel PHP MySQL
In this article, we will see crud with image upload in laravel 10 examples. Here, we will learn how to image upload with crud operation in the laravel 10 application. In this example, we will perform a crud operation with an image. You can create, read, update, and delete images.
We will create a route, controller, and model to create a crud application and store the image in the database. So, follow step by step and perform image upload with crud operation in laravel 10.
So, let's see laravel 10 crud with image upload, how to upload an image in laravel 10 with edit and delete and laravel 10 image upload.
In this step, we will install laravel 10 using the following command.
composer create-project --prefer-dist laravel/laravel laravel_10_image_upload_crud_example
Now, we will set up the database configuration in the .env file.
DB_CONNECTION=mysql
DB_HOST=127.0.0.1
DB_PORT=3306
DB_DATABASE=laravel_10_image_upload_crud
DB_USERNAME=root
DB_PASSWORD=root
Here, we will create a migration for the "posts" table using the php artisan command.
php artisan make:migration create_posts_table --create=posts
Migration:
<?php

use Illuminate\Support\Facades\Schema;
use Illuminate\Database\Schema\Blueprint;
use Illuminate\Database\Migrations\Migration;

class CreatePostsTable extends Migration {

/**
* Run the migrations.
*
* @return void */

public function up()
{
    Schema::create('posts', function (Blueprint $table) {
            $table->bigIncrements('id');
            $table->string('name')->nullable();
            $table->longText('detail')->nullable();
            $table->string('image');
            $table->timestamps();
        });
    }

    /**
     * Reverse the migrations.
     *
     * @return void
     */
    public function down()
    {
        Schema::dropIfExists('posts');
    }
}
Now, migrate the table into the database using the following command.
php artisan migrate
Now, Add the Resource route in the web.php file
routes/web.php
use App\Http\Controllers\PostController;
Route::resource('posts', PostController::class);
In this step, we will create the PostController using the following command.
php artisan make:controller PostController --resource --model=Post
Now, make changes to the Post model. So, add the below code to the model.
App/Models/Post.php
<?php

namespace App\Models;

use Illuminate\Database\Eloquent\Factories\HasFactory;
use Illuminate\Database\Eloquent\Model;

class Post extends Model
{
    use HasFactory;

    protected $fillable = [
        'id', 'name', 'detail', 'image'
    ];
}
After changes in the model, we update the code in the PostController.php file.
app/Http/Controllers/PostController.php
<?php

namespace App\Http\Controllers;

use App\Models\Post;
use Illuminate\Http\Request;

class PostController extends Controller
{
    /**
     * Display a listing of the resource.
     *
     * @return \Illuminate\Http\Response
     */
    public function index()
    {
        $posts = Post::latest()->paginate(5);
        return view('post.index',compact('posts'))->with('i', (request()->input('page', 1) - 1) * 5);
    }

    /**
     * Show the form for creating a new resource.
     *
     * @return \Illuminate\Http\Response
     */
    public function create()
    {
        return view('post.create');
    }

    /**
     * Store a newly created resource in storage.
     *
     * @param  \Illuminate\Http\Request  $request
     * @return \Illuminate\Http\Response
     */
    public function store(Request $request)
    {
        $request->validate([
            'name' => 'required',
            'detail' => 'required',
            'image' => 'required|image|mimes:jpeg,png,jpg,gif,svg|max:2048',
        ]);

        $input = $request->all();

        if ($image = $request->file('image')) {
            $destinationPath = 'images/';
            $postImage = date('YmdHis') . "." . $image->getClientOriginalExtension();
            $image->move($destinationPath, $postImage);
            $input['image'] = "$postImage";
        }

        Post::create($input);

        return redirect()->route('posts.index')->with('success','Post Create Successfully.');
    }

    /**
     * Display the specified resource.
     *
     * @param  \App\Models\Post  $post
     * @return \Illuminate\Http\Response
     */
    public function show(Post $post)
    {
        return view('post.show',compact('post'));
    }

    /**
     * Show the form for editing the specified resource.
     *
     * @param  \App\Models\Post  $post
     * @return \Illuminate\Http\Response
     */
    public function edit(Post $post)
    {
        return view('post.edit',compact('post'));
    }

    /**
     * Update the specified resource in storage.
     *
     * @param  \Illuminate\Http\Request  $request
     * @param  \App\Models\Post  $post
     * @return \Illuminate\Http\Response
     */
    public function update(Request $request, Post $post)
    {
        $request->validate([
            'name' => 'required',
            'detail' => 'required',
            'image' => 'required|image|mimes:jpeg,png,jpg,gif,svg|max:2048',
        ]);

        $input = $request->all();

        if ($image = $request->file('image')) {
            $destinationPath = 'images/';
            $postImage = date('YmdHis') . "." . $image->getClientOriginalExtension();
            $image->move($destinationPath, $postImage);
            $input['image'] = "$postImage";
        }else{
            unset($input['image']);
        }

        $post->update($input);

        return redirect()->route('posts.index')->with('success','Post Update Successfully');
    }

    /**
     * Remove the specified resource from storage.
     *
     * @param  \App\Models\Post  $post
     * @return \Illuminate\Http\Response
     */
    public function destroy(Post $post)
    {
        $post->delete();

        return redirect()->route('posts.index')->with('success','Post Deleted Successfully');
    }
}
Now, we will create blade files for layout and post files. So, create new folder "posts" and then create blade files of the Image CRUD example in laravel 10.
1. layout.blade.php
2. index.blade.php
3. create.blade.php
4. edit.blade.php
5. show.blade.php
resources/views/posts/layout.blade.php
<!DOCTYPE html>
<html>
<head>
    <title>CRUD With Image Upload In Laravel 10 Example - Websolutionstuff</title>
    <link href="https://cdn.jsdelivr.net/npm/[email protected]/dist/css/bootstrap.min.css" rel="stylesheet">
</head>
<body>

<div class="container">
    @yield('content')
</div>

</body>
</html>
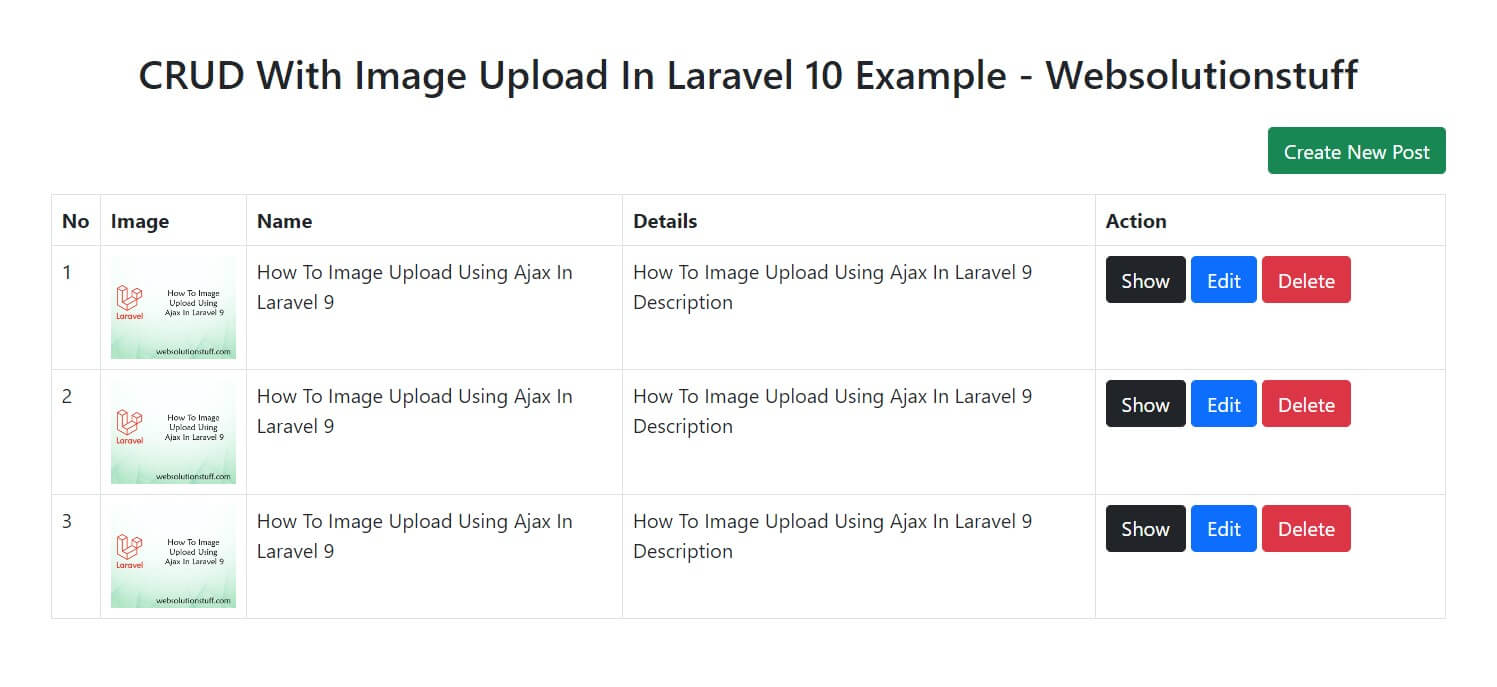
resources/views/posts/index.blade.php
@extends('post.layout')

@section('content')
    <div class="row">
        <div class="col-lg-12 margin-tb">
            <div class="pull-left">
                <h2 class="text-center mt-5">CRUD With Image Upload In Laravel 10 Example - Websolutionstuff</h2>
            </div>
            <div class="pull-right">
                <a class="btn btn-success mt-3 mb-3" href="{{ route('posts.create') }}" style="float: right;"> Create New Post</a>
            </div>
        </div>
    </div>

    @if ($message = Session::get('success'))
        <div class="alert alert-success">
            <p>{{ $message }}</p>
        </div>
    @endif

    <table class="table table-bordered">
        <tr>
            <th>No</th>
            <th>Image</th>
            <th>Name</th>
            <th>Details</th>
            <th width="280px">Action</th>
        </tr>
        @foreach ($posts as $post)
        <tr>
            <td>{{ ++$i }}</td>
            <td><img src="/images/{{ $post->image }}" width="100px"></td>
            <td>{{ $post->name }}</td>
            <td>{{ $post->detail }}</td>
            <td>
                <form action="{{ route('posts.destroy',$post->id) }}" method="POST">

                    <a class="btn btn-dark" href="{{ route('posts.show',$post->id) }}">Show</a>

                    <a class="btn btn-primary" href="{{ route('posts.edit',$post->id) }}">Edit</a>

                    @csrf
                    @method('DELETE')

                    <button type="submit" class="btn btn-danger">Delete</button>
                </form>
            </td>
        </tr>
        @endforeach
    </table>

    {!! $posts->links() !!}

@endsection
resources/views/posts/create.blade.php
@extends('post.layout')

@section('content')
<div class="row">
    <div class="col-lg-12 margin-tb">
        <div class="pull-left">
            <h2>Add New Post</h2>
        </div>
        <div class="pull-right">
            <a class="btn btn-primary" href="{{ route('posts.index') }}"> Back</a>
        </div>
    </div>
</div>

@if ($errors->any())
    <div class="alert alert-danger">
        <strong>Error!</strong> <br>
        <ul>
            @foreach ($errors->all() as $error)
                <li>{{ $error }}</li>
            @endforeach
        </ul>
    </div>
@endif

<form action="{{ route('posts.store') }}" method="POST">
    @csrf

     <div class="row">
        <div class="col-xs-12 col-sm-12 col-md-12">
            <div class="form-group">
                <strong>Name:</strong>
                <input type="text" name="name" class="form-control" placeholder="Name">
            </div>
        </div>
        <div class="col-xs-12 col-sm-12 col-md-12">
            <div class="form-group">
                <strong>Detail:</strong>
                <textarea class="form-control" style="height:150px" name="detail" placeholder="Detail"></textarea>
            </div>
        </div>
        <div class="col-xs-12 col-sm-12 col-md-12">
            <div class="form-group">
                <strong>Image:</strong>
                <input type="file" name="image" class="form-control" placeholder="image">
            </div>
        </div>
        <div class="col-xs-12 col-sm-12 col-md-12 text-center">
                <button type="submit" class="btn btn-primary">Submit</button>
        </div>
    </div>

</form>
@endsection
resources/views/posts/edit.blade.php
@extends('post.layout')

@section('content')
    <div class="row">
        <div class="col-lg-12 margin-tb">
            <div class="pull-left">
                <h2>Edit Post</h2>
            </div>
            <div class="pull-right">
                <a class="btn btn-primary" href="{{ route('posts.index') }}"> Back</a>
            </div>
        </div>
    </div>

    @if ($errors->any())
        <div class="alert alert-danger">
            <strong>Error!</strong> <br>
            <ul>
                @foreach ($errors->all() as $error)
                    <li>{{ $error }}</li>
                @endforeach
            </ul>
        </div>
    @endif

    <form action="{{ route('posts.update',$post->id) }}" method="POST">
        @csrf
        @method('PUT')

         <div class="row">
            <div class="col-xs-12 col-sm-12 col-md-12">
                <div class="form-group">
                    <strong>Name:</strong>
                    <input type="text" name="name" value="{{ $post->name }}" class="form-control" placeholder="Name">
                </div>
            </div>
            <div class="col-xs-12 col-sm-12 col-md-12">
                <div class="form-group">
                    <strong>Detail:</strong>
                    <textarea class="form-control" style="height:150px" name="detail" placeholder="Detail">{{ $post->detail }}</textarea>
                </div>
            </div>
            <div class="col-xs-12 col-sm-12 col-md-12">
                <div class="form-group">
                    <strong>Image:</strong>
                    <input type="file" name="image" class="form-control" placeholder="image">
                    <img src="/images/{{ $post->image }}" width="300px">
                </div>
            </div>
            <div class="col-xs-12 col-sm-12 col-md-12 text-center">
              <button type="submit" class="btn btn-primary">Submit</button>
            </div>
        </div>

    </form>
@endsection
resources/views/posts/show.blade.php
@extends('post.layout')
@section('content')
    <div class="row">
        <div class="col-lg-12 margin-tb">
            <div class="pull-left">
                <h2> Show Post</h2>
            </div>
            <div class="pull-right">
                <a class="btn btn-primary" href="{{ route('posts.index') }}"> Back</a>
            </div>
        </div>
    </div>

    <div class="row">
        <div class="col-xs-12 col-sm-12 col-md-12">
            <div class="form-group">
                <strong>Name:</strong>
                {{ $post->name }}
            </div>
        </div>
        <div class="col-xs-12 col-sm-12 col-md-12">
            <div class="form-group">
                <strong>Details:</strong>
                {{ $post->detail }}
            </div>
        </div>
        <div class="col-xs-12 col-sm-12 col-md-12">
            <div class="form-group">
                <strong>Image:</strong>
                <img src="/images/{{ $post->image }}" width="500px">
            </div>
        </div>
    </div>
@endsection
Now, run the laravel 9 image upload with the crud operation application.
php artisan serve
Output:
You might also like:
- Read Also: How To Image Optimization In Laravel 9 Using Spatie
- Read Also: How To Convert Image To Base64 In Laravel 9
- Read Also: Laravel 9 Resize Image Before Upload
- Read Also: Laravel 8 Add Watermark on Image
Recommended Post
Featured Post

Laravel 9 Livewire Toastr Noti...
In this article, we will see laravel 9 livewire toastr notification. Here, we will learn how to create toastr notif...
Nov-28-2022

How To Encrypt And Decrypt Str...
In this example we will see how to encrypt and decrypt string in laravel 8 using crypt helper, As we all know laravel fr...
May-07-2021

How To Validate Username And P...
In this article, we will see how to validate username and password in react js. In this example, we will validate t...
Sep-13-2022

How to Create Multi Language W...
In this article, we will see how to create a multi-language website in laravel. In this example, you can understand...
Nov-09-2020