Laravel Firebase Push Notification
Websolutionstuff | Mar-26-2021 | Categories : Laravel
In this example we will see laravel firebase push notification, firebase notification through you can notify user that new email or other messages are available to sync.
firebase push notification is a free open source and you can easily implement using your google account., firebase messaging or Firebase Cloud Messaging (FCM) is a cross-platform messaging solution that lets you reliably send messages at no cost., FCM push notification used for android,ios as well as web application.
Here i will give example of firebase web push notification or firebase web push notification in laravel, Firebase provides a realtime database and backend as a service. The service provides application developers an API that allows application data to be synchronized across clients and stored on Firebase’s cloud.
Here we will see how to set firebase push notification in laravel step by step.
Step 1 : Create Firebase Project and App for Firebase Push Notification
Step 2 : Install Laravel 8
Step 3 : Create Laravel 8 Auth Using Command
Step 4 : Create Migration and Model
Step 5 : Create Route
Step 6 : Create Controller
Step 7 : Update Blade File
Step 8 : Create firebase-messaging-sw.js File
Step 1 : Create Firebase Project and App for Firebase Push Notification
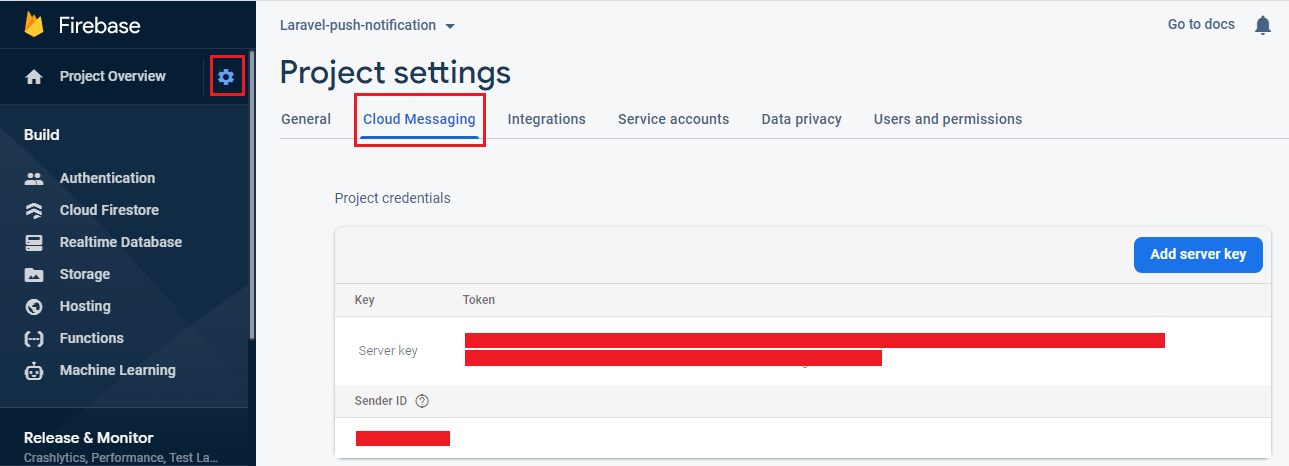
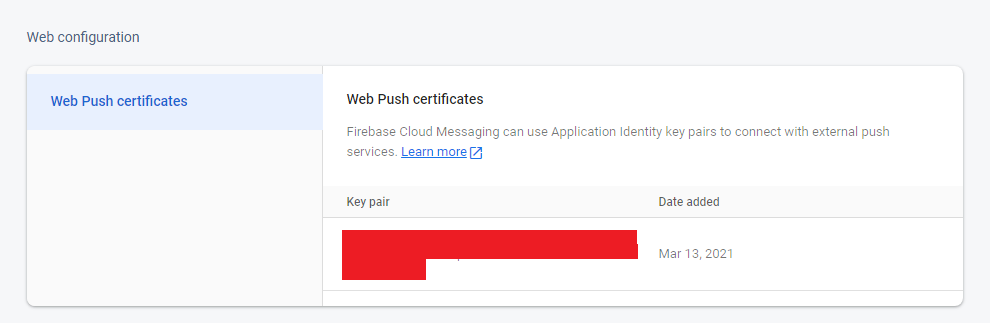
First of all we will login into Firebase Console and create new project for laravel firebase push notification.
Step 2 : Install Laravel 8
Now install new application for this example using below command
composer create-project --prefer-dist laravel/laravel Firebase_Example
Step 3 : Create Laravel 8 Auth Using Command
Now create login system using auth command in laravel 8, raun below command in your terminal.
composer require laravel/ui

php artisan ui bootstrap --auth  // For Generate Auth

npm install // TO Install NPM

npm run dev
Step 4 : Create Migration and Model
In this forth step we will add new row "device_token" in users table as well as model and after that we will to create new migration.
php artisan make:migration add_column_device_token
<?php

use Illuminate\Database\Migrations\Migration;
use Illuminate\Database\Schema\Blueprint;
use Illuminate\Support\Facades\Schema;

class AddColumnDeviceTokenToUsersTable extends Migration
{

    public function up()
    {
        Schema::table('users', function (Blueprint $table) {
            $table->string('device_token')->nullable();
        });
    }

    public function down()
    {
        Schema::table('users', function (Blueprint $table) {
            //
        });
    }
}
app/Models/User.php
<?php

namespace App\Models;

use Illuminate\Contracts\Auth\MustVerifyEmail;
use Illuminate\Database\Eloquent\Factories\HasFactory;
use Illuminate\Foundation\Auth\User as Authenticatable;
use Illuminate\Notifications\Notifiable;

class User extends Authenticatable
{
    use HasFactory, Notifiable;


    protected $fillable = [
        'name',
        'email',
        'password',
        'device_token'
    ];


    protected $hidden = [
        'password',
        'remember_token',
    ];

    protected $casts = [
        'email_verified_at' => 'datetime',
    ];
}
Now, run below command to run migration
php artisan migrate
Step 5 : Create Route
Now w will add new routes to store token and send push notification in laravel so, copy below code in your routes/web.php file
<?php

use Illuminate\Support\Facades\Route;
use App\Http\Controllers\HomeController;


Route::get('/', function () {
    return view('welcome');
});

Auth::routes();
Route::get('/home', [HomeController::class, 'index'])->name('home');
Route::post('/save-push-notification-token', [HomeController::class, 'savePushNotificationToken'])->name('save-push-notification-token');
Route::post('/send-push-notification', [HomeController::class, 'sendPushNotification'])->name('send.push-notification');
Step 6 : Create Controller
Here, I have created HomeController and added savePushNotificationToken() and sendPushNotification() function. in this controller you need to add server API key , you need to add your server key.
<?php

namespace App\Http\Controllers;

use Illuminate\Http\Request;
use App\Models\User;

class HomeController extends Controller
{

    public function __construct()
    {
        $this->middleware('auth');
    }

    public function index()
    {
        return view('home');
    }

    public function savePushNotificationToken(Request $request)
    {
        auth()->user()->update(['device_token'=>$request->token]);
        return response()->json(['token saved successfully.']);
    }

    public function sendPushNotification(Request $request)
    {
        $firebaseToken = User::whereNotNull('device_token')->pluck('device_token')->all();

        $SERVER_API_KEY = 'Enter_Your_Server_Key';

        $data = [
            "registration_ids" => $firebaseToken,
            "notification" => [
                "title" => $request->title,
                "body" => $request->body,
            ]
        ];
        $dataString = json_encode($data);

        $headers = [
            'Authorization: key=' . $SERVER_API_KEY,
            'Content-Type: application/json',
        ];

        $ch = curl_init();

        curl_setopt($ch, CURLOPT_URL, 'https://fcm.googleapis.com/fcm/send');
        curl_setopt($ch, CURLOPT_POST, true);
        curl_setopt($ch, CURLOPT_HTTPHEADER, $headers);
        curl_setopt($ch, CURLOPT_SSL_VERIFYPEER, false);
        curl_setopt($ch, CURLOPT_SSL_VERIFYHOST, 0);
        curl_setopt($ch, CURLOPT_RETURNTRANSFER, true);
        curl_setopt($ch, CURLOPT_POSTFIELDS, $dataString);

        $response = curl_exec($ch);

        dd($response);
    }
}
Step 7 : Update Blade File
Now, you need to update on your home.blade.php file and add below code.
@extends('layouts.app')

@section('content')
<div class="container">
    <div class="row justify-content-center">
        <center><h2>Laravel Firebase Push Notification - websolutionstuff.com</h2></center>
        <div class="col-md-8">
             <center>
                <button id="btn-nft-enable" onclick="initFirebaseMessagingRegistration()" class="btn btn-danger btn-xs btn-flat">Allow for Notification</button>
            </center><br>
            <div class="card">
                <div class="card-header">{{ __('Dashboard') }}</div>

                <div class="card-body">
                    @if (session('status'))
                        <div class="alert alert-success" role="alert">
                            {{ session('status') }}
                        </div>
                    @endif
                    <form action="{{ route('send.push-notification') }}" method="POST">

                        @csrf

                        <div class="form-group">

                            <label>Title</label>

                            <input type="text" class="form-control" name="title">

                        </div>

                        <div class="form-group">

                            <label>Body</label>

                            <textarea class="form-control" name="body"></textarea>

                          </div>

                        <button type="submit" class="btn btn-primary">Send Notification</button>

                    </form>
                </div>
            </div>
        </div>
    </div>
</div>
<script
    src="https://code.jquery.com/jquery-3.4.1.min.js"
    integrity="sha256-CSXorXvZcTkaix6Yvo6HppcZGetbYMGWSFlBw8HfCJo="
    crossorigin="anonymous"></script>
<script src="https://www.gstatic.com/firebasejs/8.3.0/firebase-app.js"></script>
<script src="https://www.gstatic.com/firebasejs/8.3.0/firebase-messaging.js"></script>
<script>
  var firebaseConfig = {
    apiKey: "XXXX",
    authDomain: "XXXX.firebaseapp.com",
    projectId: "XXXX",
    storageBucket: "XXXX.appspot.com",
    messagingSenderId: "XXXX",
    databaseURL: "https://Your_Project_ID.firebaseio.com",
    appId: "XXXX"
  };

    firebase.initializeApp(firebaseConfig);
    const messaging = firebase.messaging();

    function initFirebaseMessagingRegistration() {
            messaging
            .requestPermission()
            .then(function () {
                return messaging.getToken({ vapidKey: 'Your_Public_Key' })
            })
            .then(function(token) {
                console.log(token);

                $.ajaxSetup({
                    headers: {
                        'X-CSRF-TOKEN': $('meta[name="csrf-token"]').attr('content')
                    }
                });

                $.ajax({
                    url: '{{ route("save-push-notification-token") }}',
                    type: 'POST',
                    data: {
                        token: token
                    },
                    dataType: 'JSON',
                    success: function (response) {
                        alert('Token saved successfully.');
                    },
                    error: function (err) {
                        console.log('User Chat Token Error'+ err);
                    },
                });

            }).catch(function (err) {
                console.log('User Chat Token Error'+ err);
            });
     }

    messaging.onMessage(function(payload) {
        const noteTitle = payload.notification.title;
        const noteOptions = {
            body: payload.notification.body,
            icon: payload.notification.icon,
        };
        new Notification(noteTitle, noteOptions);
    });

</script>
@endsection
Step 8 : Create firebase-messaging-sw.js File
Now, we will create firebase-messaging-sw.js in public folder and copy below code.
importScripts('https://www.gstatic.com/firebasejs/8.3.0/firebase-app.js');
importScripts('https://www.gstatic.com/firebasejs/8.3.0/firebase-messaging.js');

	firebase.initializeApp({
        apiKey: "XXXX",
	    authDomain: "XXXX.firebaseapp.com",
	    databaseURL: "https://Your_Project_Id.firebaseio.com",
	    projectId: "XXXX",
	    storageBucket: "XXXX.appspot.com",
	    messagingSenderId: "XXXX",
	    appId: "XXXX"
    });

	const messaging = firebase.messaging();
	messaging.setBackgroundMessageHandler(function(payload) {
    console.log(
        "[firebase-messaging-sw.js] Received background message ",
        payload,
    );

    const notificationTitle = "Background Message Title";
    const notificationOptions = {
        body: "Background Message body.",
        icon: "/itwonders-web-logo.png",
    };

    return self.registration.showNotification(
        notificationTitle,
        notificationOptions,
    );
});
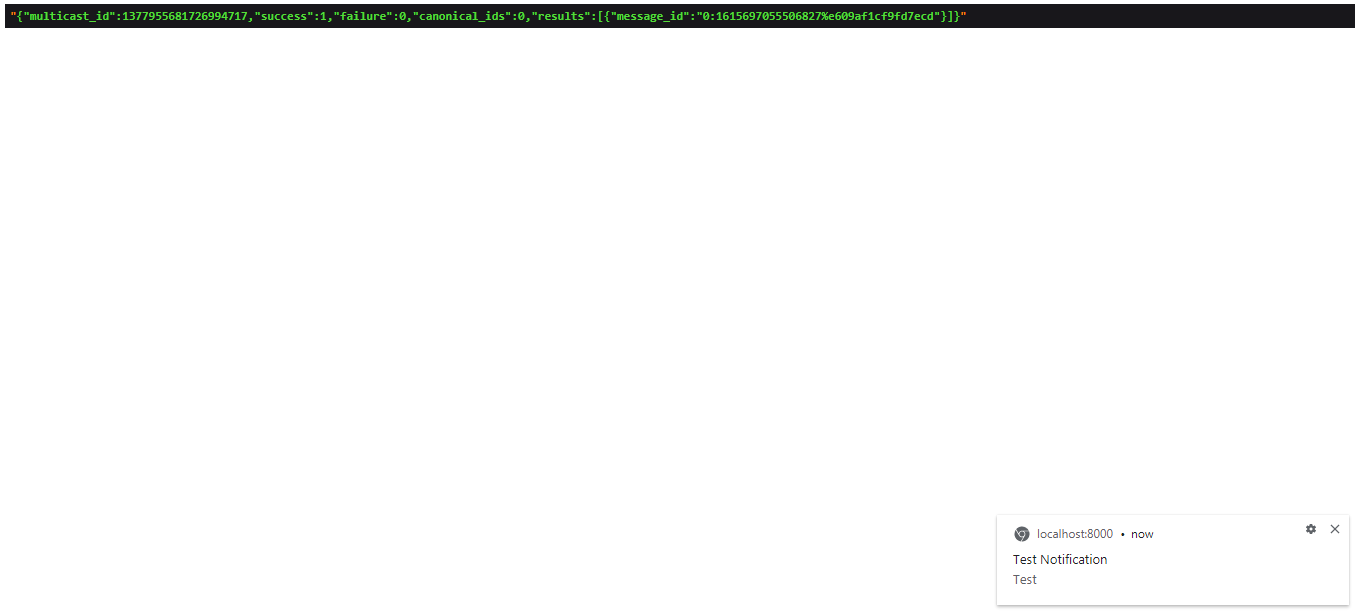
Output :
Recommended Post
Featured Post

How to Create Custom Facade in...
Laravel, one of the most popular PHP frameworks, provides a powerful feature known as facades. Facades allow you to acce...
Sep-22-2023

How To Create Dynamic Pie Char...
In this article, we will see how to create a dynamic pie chart in laravel 8. Pie charts are used to represent...
Oct-02-2020

Laravel 8 Send Mail using Queu...
In this tutorial I will show you laravel 8 send mail using queue, many time we can see some process to take mo...
Sep-24-2021

How To Install Tailwind CSS In...
In this article, we will see how to install tailwind CSS in laravel 9. Tailwind CSS works by scanning all of y...
Jun-13-2022